Docker Nginx#
remove all container
docker rm -v -f $(docker ps -qa)
run a nginx
docker run --name web -p 8080:8080 -v ./:/usr/share/nginx/html:ro -d public.ecr.aws/nginx/nginx:1.27-alpine3.19-slim
exec in to a running container
docker exec -it container_name /bin/bash
inspect into running container
docker exec -it 394afc2927c2 ls -l /usr/share/nginx/html
Update configure#
aws eks update-kubeconfig --name eks-stack-eks-cluster
Get service account.
kubectl -n kube-system get serviceaccount/ebs-csi-controller-sa -o yaml
Create identity provider.
eksctl utils associate-iam-oidc-provider \--cluster=eks-stack-eks-cluster \--approve
Create trusted policy.
{"Version": "2012-10-17","Statement": [{"Effect": "Allow","Principal": {"Federated": "arn:aws:iam::633688584000:oidc-provider/oidc.eks.us-west-2.amazonaws.com/id/9D29659801172AADAE5B5A48CA2FE5BA"},"Action": "sts:AssumeRoleWithWebIdentity","Condition": {"StringEquals": {"oidc.eks.us-west-2.amazonaws.com/id/9D29659801172AADAE5B5A48CA2FE5BA:aud": "sts.amazonaws.com","oidc.eks.us-west-2.amazonaws.com/id/9D29659801172AADAE5B5A48CA2FE5BA:sub": "system:serviceaccount:kube-system:ebs-csi-controller-sa"}}}]}
First App#
Let's run a busybox.
kubectl run busybox --image=busybox --rm -it --command -- bin/sh
Let's run a nginx image.
Let's run an aws cli image.
kubectl run awscli --image=public.ecr.aws/aws-cli/aws-cli:latest -it --command -- /bin/sh
We can run locally to check the image.
docker run -it --entrypoint /bin/sh public.ecr.aws/aws-cli/aws-cli:latest
AWS CLI#
Let's run an aws cli image
kubectl run awscli --image=public.ecr.aws/aws-cli/aws-cli:latest -it --command -- /bin/sh
Then check caller identity
aws sts get-caller-identity
Create a deployment for awscli
kubectl apply -f awscli.yaml
Shell into a running pod
kubectl exec --stdin --tty awscli -- /bin/sh
Nginx#
Let's creat a pod
kubectl run ngix --image=nginx --dry-run=client --output=yaml > nginx.yaml
Here is nginx.yaml file
apiVersion: v1kind: Podmetadata:creationTimestamp: nulllabels:run: nginxname: nginxspec:containers:- image: public.ecr.aws/nginx/nginx:1.26.1-alpine3.19-slimname: nginxresources: {}dnsPolicy: ClusterFirstrestartPolicy: Alwaysstatus: {}
Shell into a running pod
kubectl exec --stdin --tty nginx -- /bin/sh
Run another command
kubectl exec --stdin --tty nginx -- ls -l /usr/share/nginx/html/
Mount Volume Node#
Let's create a volume, claim, and mount to a node.
apiVersion: v1kind: PersistentVolumemetadata:name: task-pv-volumelabels:type: localspec:storageClassName: manualcapacity:storage: 10GiaccessModes:- ReadWriteOncehostPath:path: '/mnt/data'---apiVersion: v1kind: PersistentVolumeClaimmetadata:name: task-pv-claimspec:storageClassName: manualaccessModes:- ReadWriteOnceresources:requests:storage: 3Gi---apiVersion: v1kind: Podmetadata:name: task-pv-podspec:volumes:- name: task-pv-storagepersistentVolumeClaim:claimName: task-pv-claimcontainers:- name: task-pv-containerimage: public.ecr.aws/nginx/nginx:1.26.1-alpine3.19-slimports:- containerPort: 80name: 'http-server'volumeMounts:- mountPath: '/usr/share/nginx/html'name: task-pv-storage
Run the pod and exec into it.
kubectl exec --stdin --tty task-pv-pod -- /bin/sh
Create a html file either from container or the volume in EC2 node.
cd /usr/share/nginx/htmltouch index.htmlwget http://localhost
Describe the pod to find EC2 node IP and SSM into it to check the volume.
kubectl describe pods task-pv-pod -n default
Access the EC2 node and check the volume. There should be a index.html there.
cd /mnt/data
Port forwarding to quickly check the web.
kubectl port-forward pod/task-pv-pod 8080:80
Expose Service#
Let's expose the nginx service via LoadBalancer or NodePort. In case of NodePort, we can access the service from a EC2 node on an assigned port.
apiVersion: v1kind: PersistentVolumemetadata:name: task-pv-volumelabels:type: localspec:storageClassName: manualcapacity:storage: 10GiaccessModes:- ReadWriteOncehostPath:path: '/mnt/data'---apiVersion: v1kind: PersistentVolumeClaimmetadata:name: task-pv-claimspec:storageClassName: manualaccessModes:- ReadWriteOnceresources:requests:storage: 3Gi---apiVersion: v1kind: Podmetadata:name: task-pv-podlabels:name: task-pv-podspec:volumes:- name: task-pv-storagepersistentVolumeClaim:claimName: task-pv-claimcontainers:- name: task-pv-containerimage: public.ecr.aws/nginx/nginx:1.26.1-alpine3.19-slimports:- containerPort: 80name: 'http-server'volumeMounts:- mountPath: '/usr/share/nginx/html'name: task-pv-storage---apiVersion: v1kind: Servicemetadata:name: nginx-servicespec:selector:name: task-pv-podports:- protocol: TCPport: 80targetPort: 80type: NodePort
Let's find the assigned port. In this case the NodePort service port is 32195.
kubectl get services -n default
Access the EC2 node and check the service.
curl http://localhost:32195
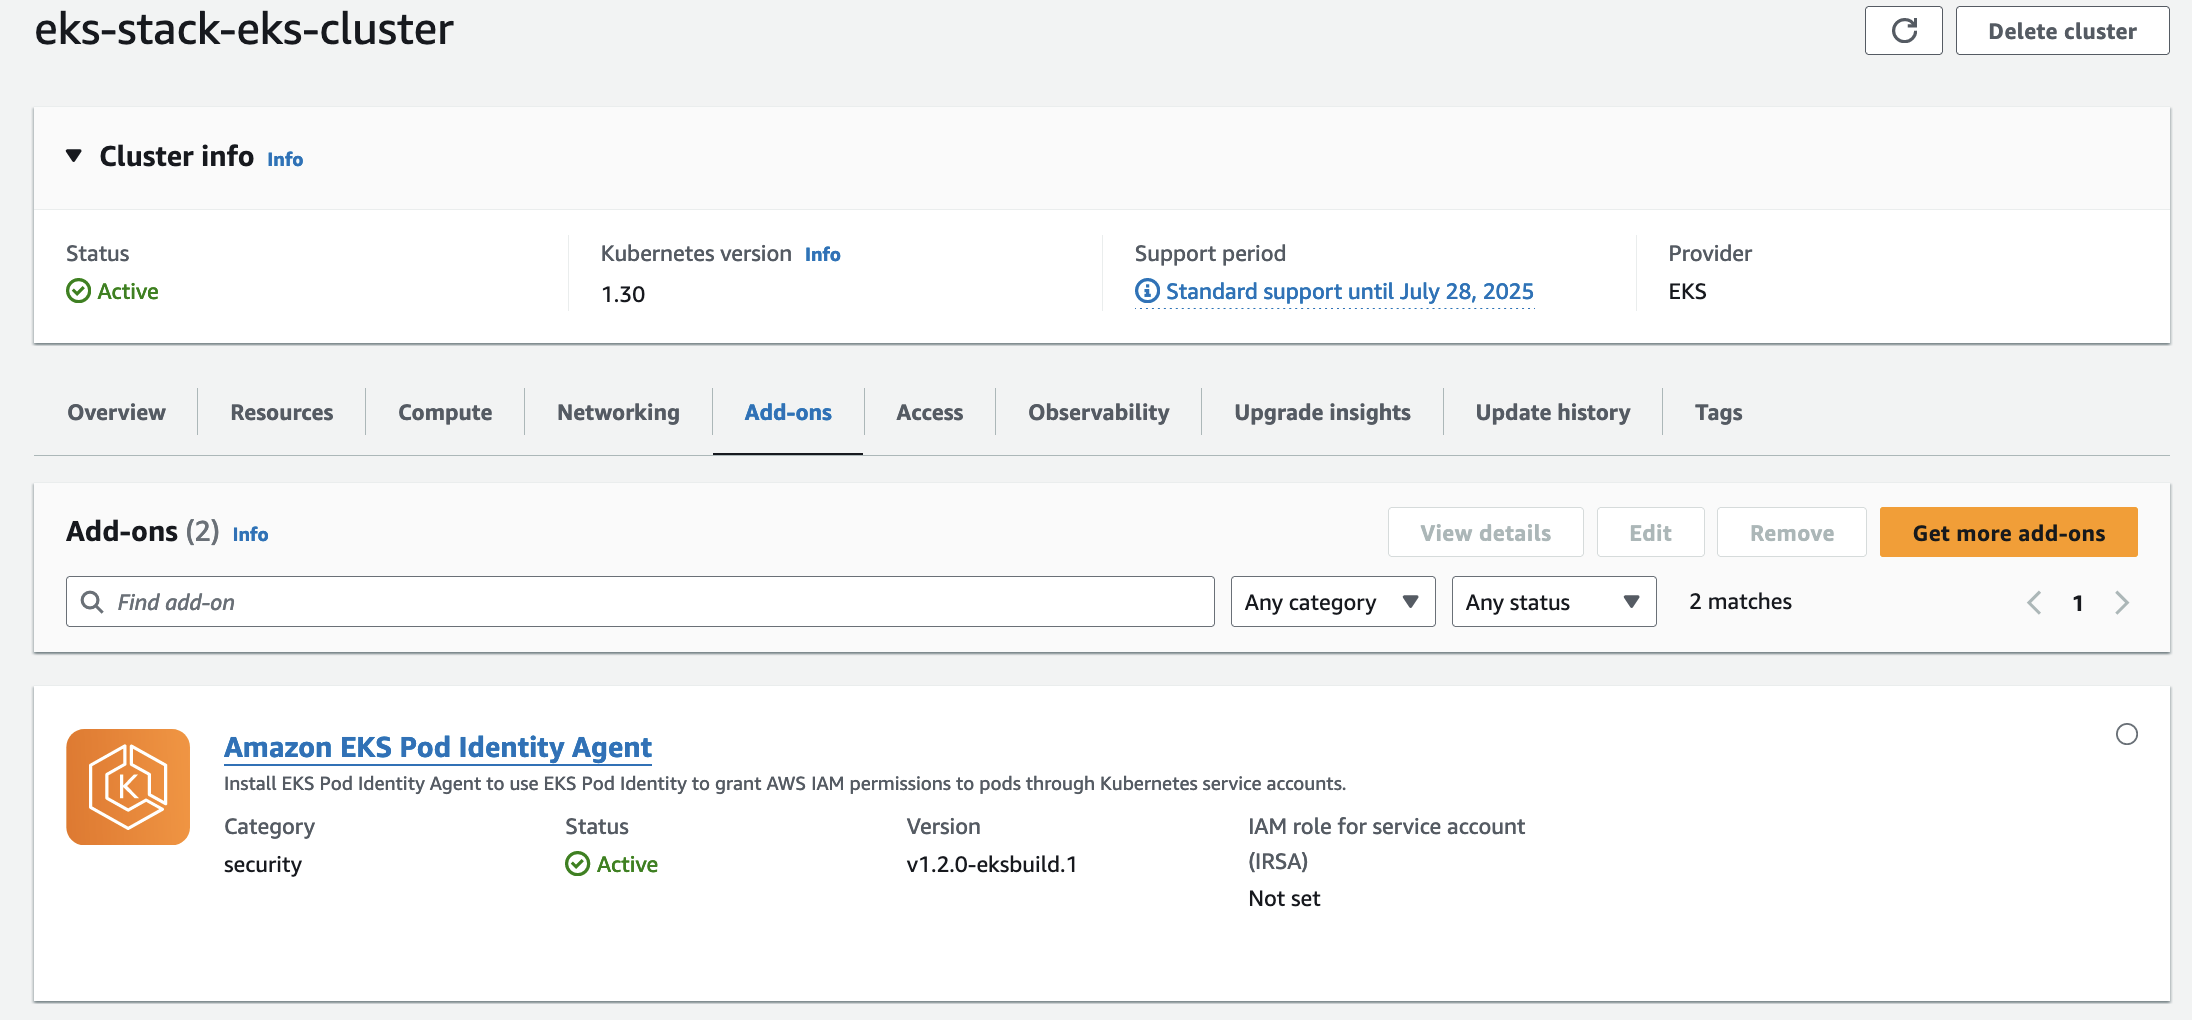
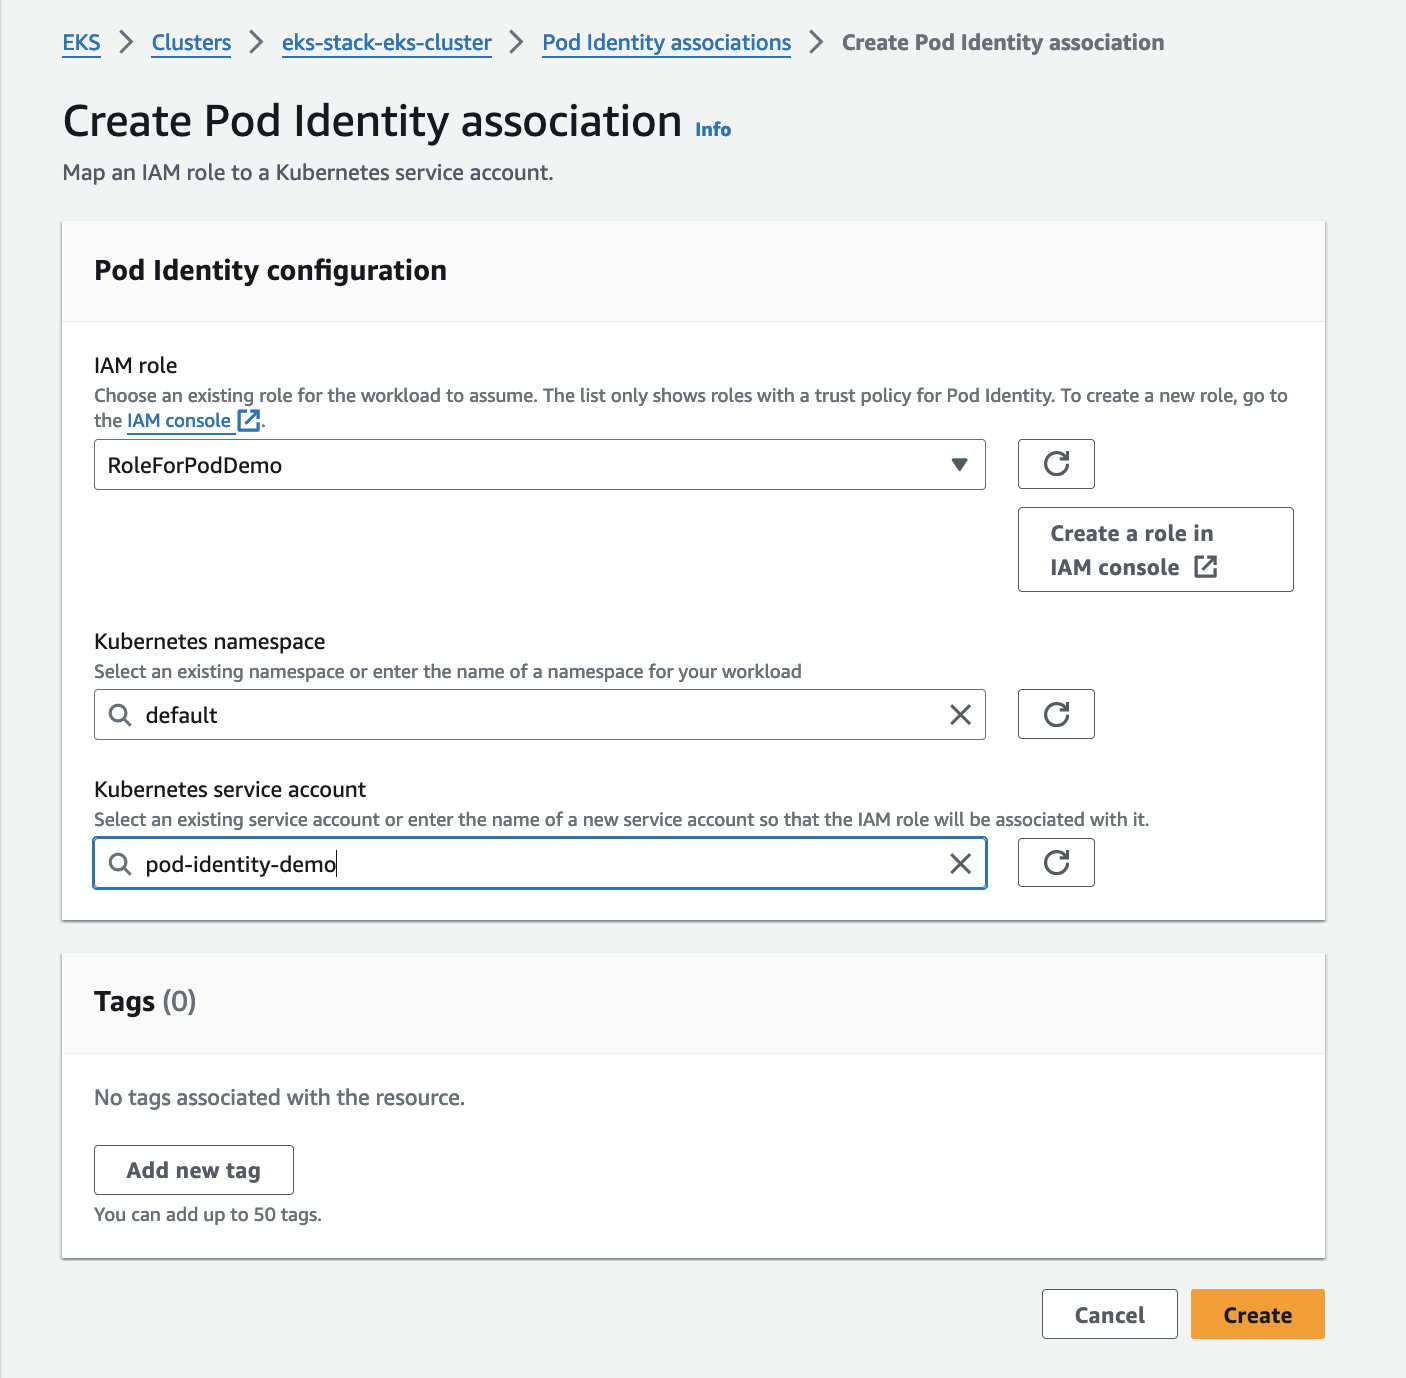
Pod Identity#
- install amazon eks pod identity agent eks add-on
- create an iam role named RoleForPodDemo
- create a service account name pod-identity-demo
- create a pod identity association
First, let's install the add-on from console.
Second, create a service account in eks.
kubectl create serviceaccount pod-identity-demo -n default
Deploy awscli pod with the service account.
kubectl apply -f yaml/hello.yaml
Here is the hello.yaml.
apiVersion: v1kind: Podmetadata:creationTimestamp: nulllabels:run: awscliname: awsclispec:serviceAccountName: pod-identity-democontainers:- image: public.ecr.aws/aws-cli/aws-cli:latestname: awscliresources: {}dnsPolicy: ClusterFirstrestartPolicy: Alwaysstatus: {}
Third, create a pod identity association from console
Finally, let's test it, shell into a running pod
kubectl exec --stdin --tty awscli -- /bin/sh
Create a bucket
aws s3api create-bucket --bucket haimtran-demo-02062024 --region us-west-2 --create-bucket-configuration LocationConstraint=us-west-2
Or using this command
aws s3 mb s3://haimtran-demo-03062024
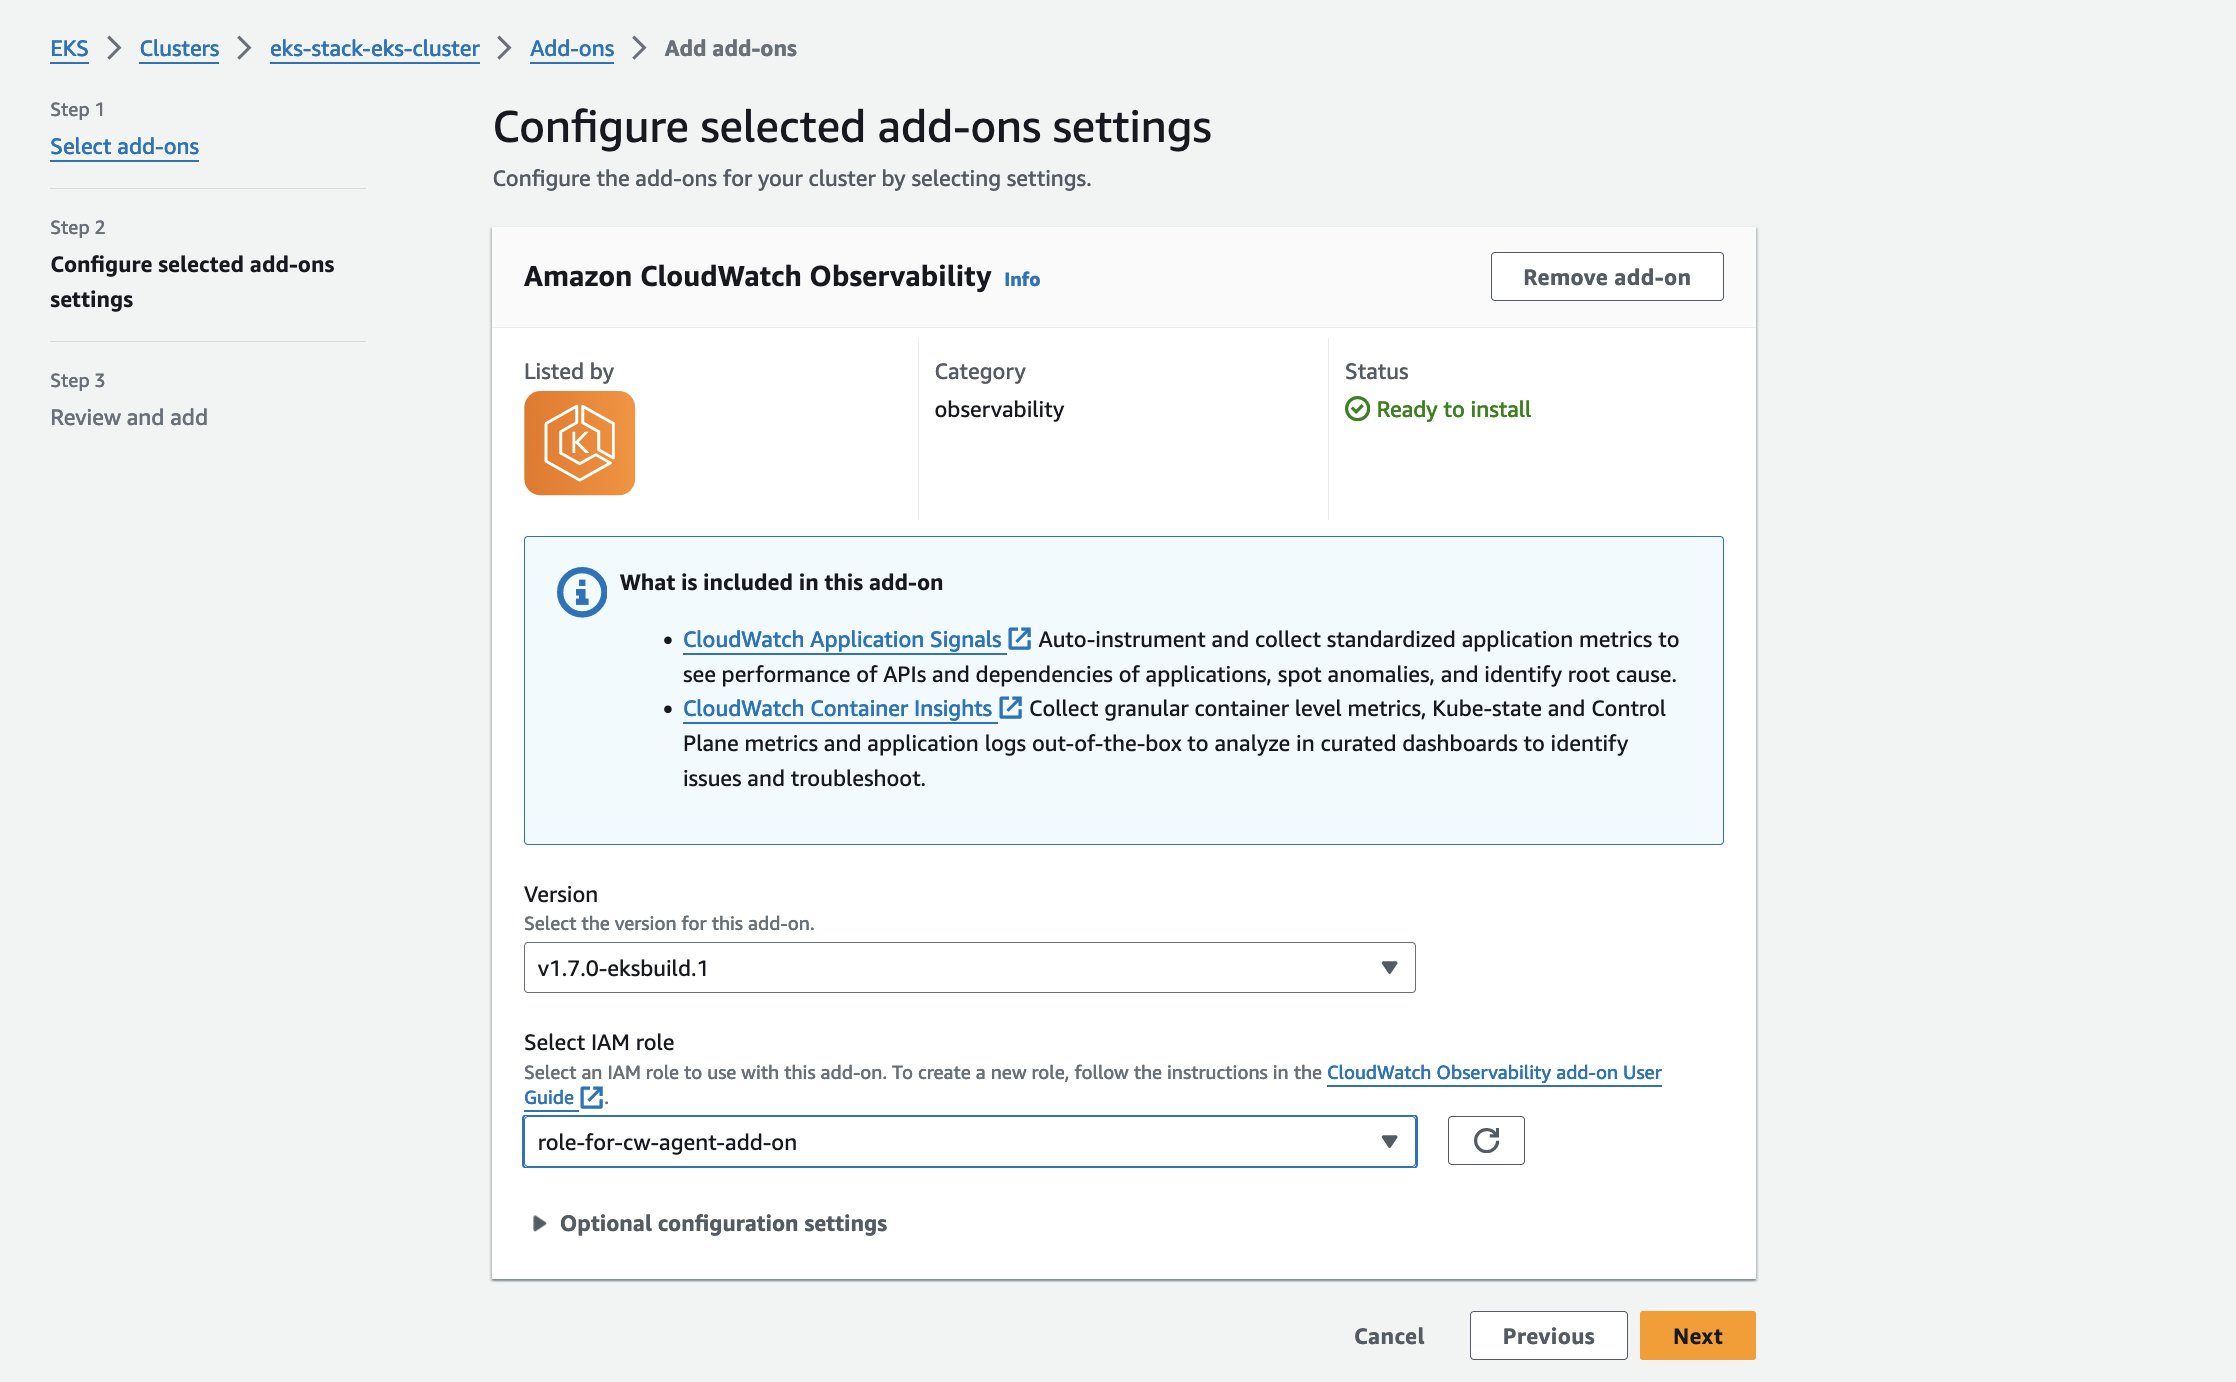
Container Insight#
- create an iam role for service account used by cwagent
- install the amazon cw observability eks add-on
First, let create an iam role which will be used by the cwagent service account. It is possible to use eksctl or standard method.
eksctl utils associate-iam-oidc-provider --cluster eks-stack-eks-cluster --approve
eksctl create iamserviceaccount \--name cloudwatch-agent \--namespace amazon-cloudwatch --cluster eks-stack-eks-cluster \--role-name role-for-cw-agent-add-on \--attach-policy-arn arn:aws:iam::aws:policy/CloudWatchAgentServerPolicy \--role-only \--approve
This eksctl command below will create a CloudFormation template under the hood. It add the aws managed policy arn:aws:iam::aws:policy/CloudWatchAgentServerPolicy.
arn:aws:iam::aws:policy/CloudWatchAgentServerPolicy
And a trusted policy.
trusted-policy.json
{"Version": "2012-10-17","Statement": [{"Effect": "Allow","Principal": {"Federated": "arn:aws:iam::094847457777:oidc-provider/oidc.eks.us-west-2.amazonaws.com/id/C048A79AB478F38A58EF0C5B4915934D"},"Action": "sts:AssumeRoleWithWebIdentity","Condition": {"StringEquals": {"oidc.eks.us-west-2.amazonaws.com/id/C048A79AB478F38A58EF0C5B4915934D:sub": "system:serviceaccount:amazon-cloudwatch:cloudwatch-agent","oidc.eks.us-west-2.amazonaws.com/id/C048A79AB478F38A58EF0C5B4915934D:aud": "sts.amazonaws.com"}}}]}
Second, add the amazon cw observability (add-on) from console, it will create a serviceaccount name cloudwatch-agent in namespace amazon-cloudwatch.
Describe the annoted role.
kubectl describe serviceaccounts amazon-cloudwatch-observability-controller-manager -n amazon-cloudwatch
And see role binding.
Name: amazon-cloudwatch-observability-controller-managerNamespace: amazon-cloudwatchLabels: app.kubernetes.io/instance=amazon-cloudwatch-observabilityapp.kubernetes.io/managed-by=EKSapp.kubernetes.io/name=amazon-cloudwatch-observabilityapp.kubernetes.io/version=1.0.0Annotations: eks.amazonaws.com/role-arn: arn:aws:iam::094847457777:role/role-for-cw-agent-add-on
Finally, go to cloudwatch container insights and filter by namespaces to see how pods running with metrics, and logs.
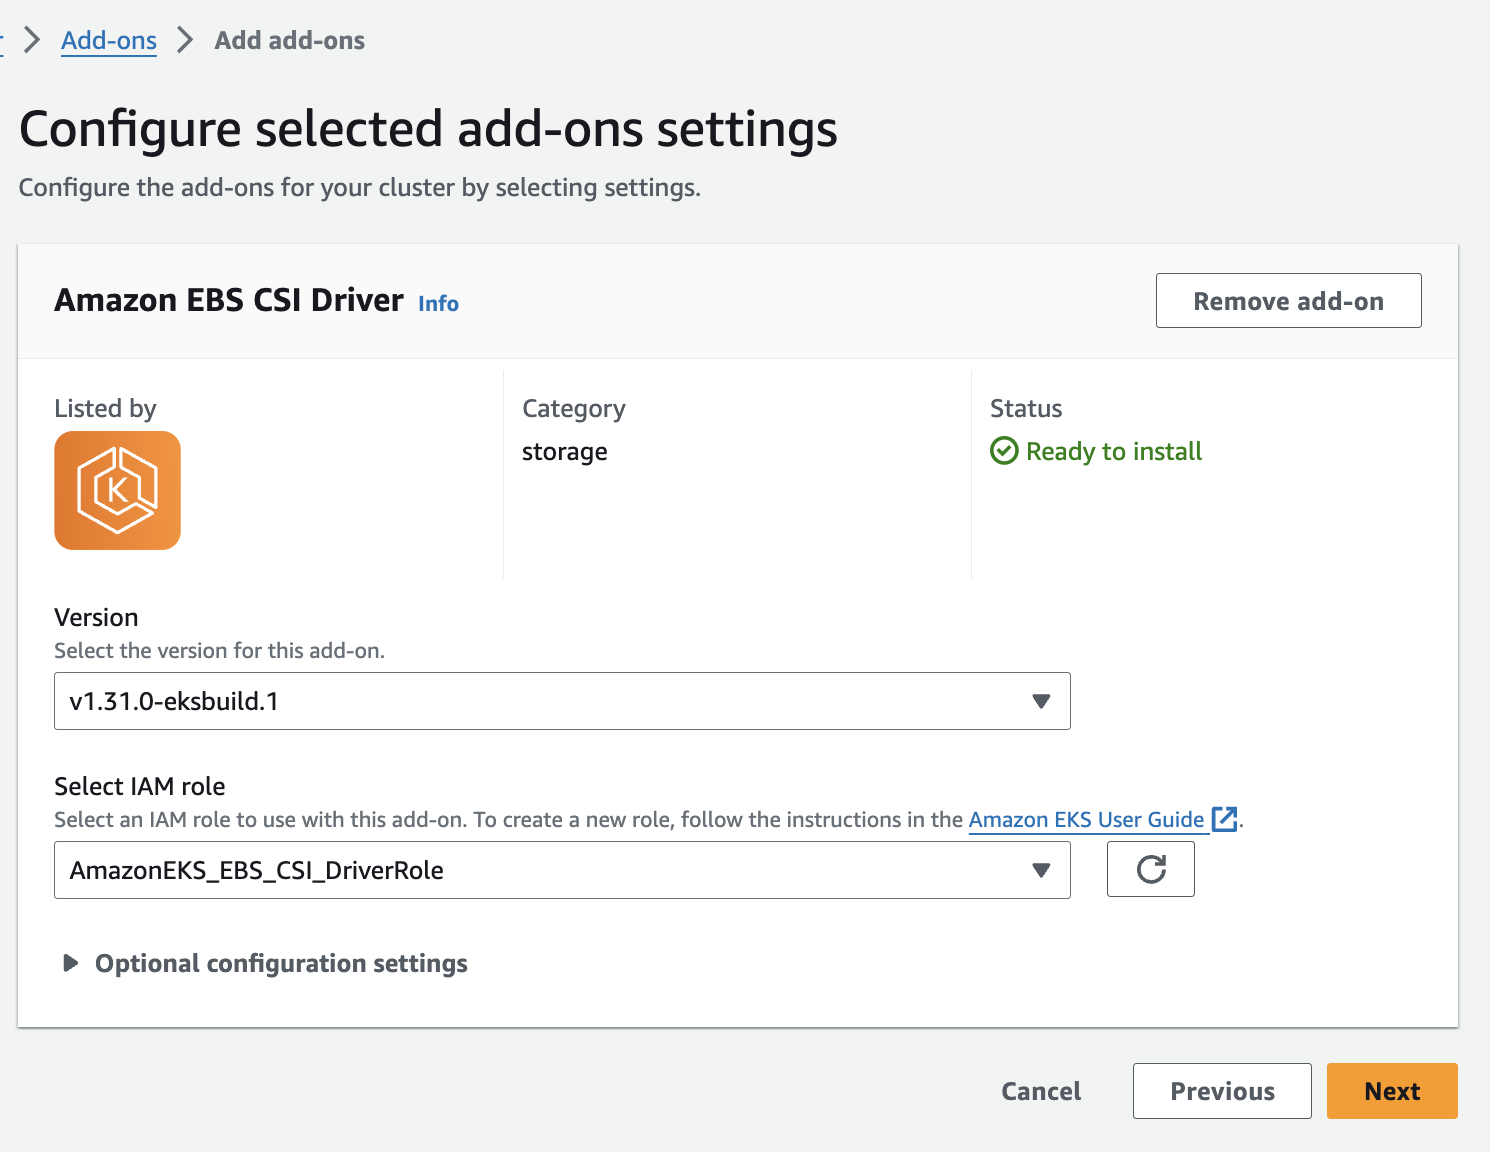
EBS CSI#
- create an iam role for the csi driver.
- install the ebs csi add-on.
Let's create a role which will be used by the drive and annotated with a service account. Add this aws managed policy arn:aws:iam::aws:policy/service-role/AmazonEBSCSIDriverPolicy and the following trusted policy.
arn:aws:iam::aws:policy/service-role/AmazonEBSCSIDriverPolicy
trusted-policy.json
{"Version": "2012-10-17","Statement": [{"Effect": "Allow","Principal": {"Federated": "arn:aws:iam::094847457777:oidc-provider/oidc.eks.us-west-2.amazonaws.com/id/C048A79AB478F38A58EF0C5B4915934D"},"Action": "sts:AssumeRoleWithWebIdentity","Condition": {"StringEquals": {"oidc.eks.us-west-2.amazonaws.com/id/C048A79AB478F38A58EF0C5B4915934D:aud": "sts.amazonaws.com","oidc.eks.us-west-2.amazonaws.com/id/C048A79AB478F38A58EF0C5B4915934D:sub": "system:serviceaccount:kube-system:ebs-csi-controller-sa"}}}]}
Then let's install the add-on.