
Introduction#
Github this is day 5 and shows
- Setup Amplify for swift ios
- Basic Amplify Graphql
- Basic UI
- Basic MVVM for the chat app
Chat UI
Subscribe Messages from AWS Appsync

Setup Amplify for Swift IOS#
clone an existing amplify backend project
amplify pull
the clone amplify structure
amplify|--amplifyconfiguration.json|--awsconfiguration.json|--backend|--api|--amplifygraphqldemo|--schema.graphql
add api graphql
amplify add api
add a data model to graphql.schema
type Message @model {id: ID!text: Stringreceived: Boolean}
then update the amplify backend
amplify push
generate swift code for the modesl
amplify codegen models
then copy the generated swift code and amplifyconfiguration.sjon into the project
SwiftUI30Days|--day5|--AmplifyModels.swift|--Message.swift|--Message+Schema.swift|--Da5ChatAppView.swift
then add depenencies (Amplify Swift lib) to the xcode project. use pod install or from xcode add package
https://github.com/aws-amplify/amplify-swift
Update Model#
we might need to delete an existing model from schema.graphql first then push to aws
amplify push
or try this
amplify api update
then create a new model in schema.graphql (add user)
type Message @model {id: ID!user: Stringtext: Stringreceived: Boolean}
then update again by amplify cli
amplify update
Basic Amplify GraphQL Swift#
init and configure the amplify lib in the app file as
import SwiftUIimport Combineimport Amplifyimport AWSAPIPluginimport AWSCognitoAuthPluginimport AWSDataStorePlugin@mainstruct SwiftUI30DaysApp: App {@ObservedObject var sot = Day5SourceOfTruth()init(){configureAmplify()}var body: some Scene {WindowGroup {Day5ChatAppView(sot: sot)}}func configureAmplify(){do {try Amplify.add(plugin: AWSCognitoAuthPlugin())try Amplify.add(plugin: AWSAPIPlugin())try Amplify.add(plugin: AWSDataStorePlugin(modelRegistration: AmplifyModels()))try Amplify.configure()print("Amplify configured successuflly")} catch {print("Amplify configure error \(error)")}}}
use graphql to list messages and creaet a message as. It is possible to write graphql as literal string as well (old method)
class Day5SourceOfTruth : ObservableObject {@Published var messages = [Message]()init(){self.messages = []}func sendMessage(message: Message){self.messages.append(message)}func listMessages() async {do {let request = GraphQLRequest<Message>.list(Message.self)let result = try await Amplify.API.query(request: request)switch result {case .success(let items):Task {@MainActor inself.messages = items}case .failure(let error):print("error \(error)")}} catch let error as DataStoreError {print("error datastore amplify \(error)")}catch {print("amplify error ")}}func createMessage(message: Message) async {do {let result = try await Amplify.API.mutate(request: .create(message))print(result)} catch {print("amplify error")}}}
note when create a message need to add createdAt field
await sot.createMessage(message: Message(text: message, received: true, createdAt: Temporal.DateTime(Date())))
My Own GraphQL#
it is possible to create my own GraphQLRequest and document. For example subscribe with filter by user at the server side
func subscribeByMyQuery() async {let document = """subscription OnCreateMessage {onCreateMessage(filter: {user: {eq: "hai"}}) {idusertextreceivedcreatedAt}}"""let request = GraphQLRequest<Message>(document: document, responseType: Message.self, decodePath: "onCreateMessage")let sub = Amplify.API.subscribe(request: request)Task {do {for try await subEvent in sub {switch subEvent {case .connection(let subConnectionState):print("sub connection state \(subConnectionState)")case .data(let result):switch result {case .success(let createMessage):print("create message \(createMessage)")Task {@MainActor inself.messages.append(createMessage)}case .failure(let error):print("got failed result \(error)")}}}} catch {print("subscription error \(error)")}}}
list messages with my own graphql
func listMessagesByMyQuery() async {let document = """query ListMessages {listMessages {items {idusertextreceivedcreatedAtupdatedAt}}}"""let request = GraphQLRequest<[Message]>(document: document, responseType: [Message].self, decodePath: "listMessages.items")// let request = GraphQLRequest<JSONValue>(document: document, responseType: JSONValue.self)do {let result = try await Amplify.API.query(request: request)switch result {case .success(let items):Task {@MainActor inself.messages = items}case .failure(let error):print("error \(error)")}}catch {print("amplify error ")}}
Basic UI#
to have the bubble chat, first create a shape
struct Day5RoundedCorner : Shape {var radius : CGFloat = .infinityvar corners: UIRectCorner = .allCornersfunc path(in rect: CGRect) -> Path {let path = UIBezierPath(roundedRect: rect, byRoundingCorners: corners, cornerRadii: CGSize(width: radius, height: radius))return Path(path.cgPath)}}
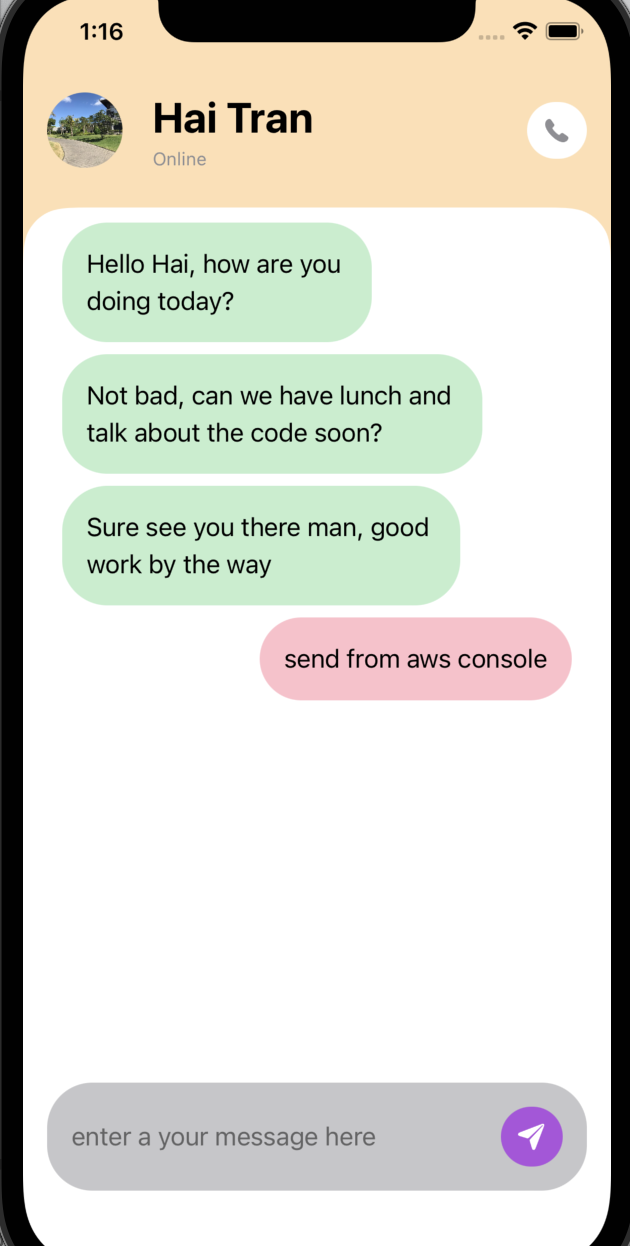
the bubble chat message
struct Day5MessageBubble : View {var message: Message@State private var showTime = falsevar body: some View {VStack(alignment: message.received! ? .leading : .trailing) {HStack {Text(message.text!).padding().background(message.received! ? Color.green.opacity(0.3) : Color.pink.opacity(0.3)).cornerRadius(30)}.frame(maxWidth: 300, alignment: message.received! ? .leading : .trailing).onTapGesture {showTime.toggle()}if showTime {Text("\(Date().formatted(.dateTime.hour().minute()))").font(.caption2).foregroundColor(Color.black).padding(message.received! ? .leading : .trailing, 0)}}.frame(maxWidth: .infinity, alignment: message.received! ? .leading : .trailing).padding(message.received! ? .leading : .trailing).padding(.horizontal, 10)}}
the use clipshape to format a message chat
.clipShape(Day5RoundedCorner(radius: 30, corners: [.topLeft, .topRight]))